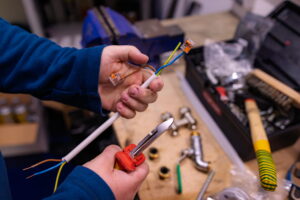
For wire connections that are safe and long-lasting, workers need to learn how to connect wires correctly to standard — starting with understanding wire colors, choosing the right tools, and applying the various wire-connection methods properly — to prevent heat build-up, short circuits, and reduce the risk of fire.
Know the New Wire Color Standard Before You Start
Before doing any wire-connection work, it’s important to understand the new international wire color-code standard, to reduce mistakes and improve safety:
- Line (L): brown insulation — a wire that always carries current; work with the utmost caution.
- Neutral (N): blue insulation — carries current back to complete the circuit; normally not live, but can carry leakage current if the system malfunctions.
- Ground (G): green-and-yellow striped insulation — carries leakage current safely to earth, protecting against electric shock and leakage.
How to Connect Wires Correctly to Standard
Safety is the heart of electrical work, so you must know the basic steps and follow them strictly:
- Always switch off and cut the power first: to prevent electric shock, switch off the breaker before every connection and use a voltage tester to confirm no current remains in the system.
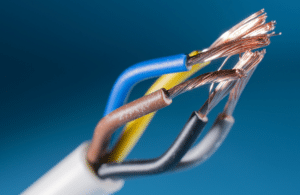
- Strip the wire to the right length: safe connections start with stripping about 1–2 cm of insulation, taking care not to nick the copper core, which would make the wire break easily and reduce conductivity.
- Join wires tightly: connections must be twisted firmly and evenly into one piece; a loose join creates high resistance — the main cause of heat build-up.
- Use standards-compliant protective materials: once the connection is done, cover the joint completely with materials like electrical tape or a connector to keep out moisture and reduce the risk of current leakage.
Tools Used to Connect Wires
Choosing the right tools makes the work faster and gives a quality joint. Basic tools you should have include:
- Wire strippers: to cleanly strip insulation without damaging the copper core.
- Wire cutters: to cut wire to the required length; choose sharp cutters for a clean, straight cut.
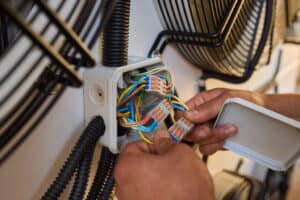
- Wire connectors: to join wires more securely and safely than twisting by hand.
- Cable lugs: to terminate wire ends before connecting to equipment, increasing conductive contact area and preventing loose connections.
- Electrical tape: to insulate the joint, preventing leakage, moisture, and short circuits.
- Heat-shrink tubing: slipped over the joint and heated to shrink tight, adding strength and a tidy finish.
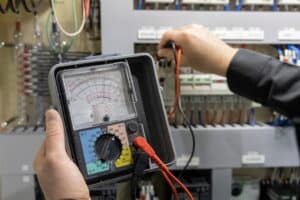
- Voltage tester (or test screwdriver): to check voltage before and after work, confirming the power is fully off.
How to Connect 3 Wires — Simple, Safe, and Practical
In many cases, wiring requires an additional branch connection. Here are the steps for connecting 3 wires:
| Step | Method | Details & Cautions |
|---|---|---|
| 1 | Separate the wires clearly | Separate the incoming, outgoing, and ground wires; never join wires of different colors together. |
| 2 | Strip the wires | Strip the ends to equal lengths of 1.5–2 cm so the twist is balanced. |
| 3 | Combine and join tightly | Hold the ends parallel and twist them the same direction firmly with pliers, or use a 3-way connector. |
| 4 | Insulate | Wrap tape tightly with several overlapping turns, sealing the joint completely against leakage and moisture. |
Common Mistakes When Connecting Wires
Working with electrical systems, neglecting small details can lead to danger. Mistakes to avoid include:
- A loose joint creates electrical resistance, causing high heat that leads to sparking and can escalate into flames or fire.
- Substandard tape, under continuous heat, has its adhesive ooze and its insulation melt and peel away, exposing the copper core to air or metal structures.
- Twisting large and small wires together without the correct technique makes current flow unbalanced, overheating the small wire and letting it slip out of the twist easily.
- Wrapping tape incompletely, or leaving copper exposed, risks a short circuit when insects, moisture, or people come into contact.
Techniques for Long-Lasting Wire Connections
Beyond connecting wires to standard, proactive maintenance also extends the life of the electrical system:
- If you notice scorch marks, melted plastic, or an unusual smell, cut the power and fix it immediately.
- Prevent leakage by using waterproof boxes and fittings for connection points outside the building.
- Use high-quality materials, such as solid copper wire or premium-grade electrical tape, to reduce heat build-up and improve long-term safety.
Connecting wires yourself isn’t difficult if you understand the principles and choose the wire-connection method that suits the job. Above all, always follow the standards for maximum safety of life and property — and every time you finish a connection, don’t forget to seal the joint completely to prevent leakage and short circuits.
Frequently Asked Questions About Connecting Wires (FAQs)
Q: How can I safely connect wires in damp areas or outdoors?
A: In damp areas, use waterproofing specifically made for it — such as a waterproof junction box or adhesive-lined heat-shrink tubing. For an even safer connection, wrap self-amalgamating tape tightly over the joint to seal out water and effectively prevent leakage.
Q: What should I watch for when connecting wires of different sizes?
A: When joining a large single-core wire to a small stranded wire, never braid-twist them directly — it will be loose and overheat. Instead, wrap the small wire over the large one and fold the end to lock it; or, for safety and standard compliance, use a wire connector that supports different sizes.
Q: How can I tell if an existing wire connection is starting to fail or deteriorate?
A: Warning signs of a failing joint are heat build-up with a burning smell, and insulation that discolors, swells, melts, or becomes brittle and cracked. If you find this, cut the power and fix it immediately. To prevent long-term problems, use standards-compliant materials such as heat-resistant electrical tape to prevent melting and extend the system’s life.